Installing a solar battery at home feels like a huge relief, especially in Pakistan, where load shedding and expensive electricity bills have become a daily problem. Many homeowners are now shifting toward solar systems with battery backup so they can enjoy uninterrupted power during outages and save money on electricity costs.
Today’s mainstream residential energy storage lithium battery, the Knox Powerwall 6.11, stores excess solar energy generated during the day to power households at night or during periods of power rationing. While selecting a high-quality battery is certainly important, compliant installation is equally critical. Substandard installation can shorten the battery’s service life, create hidden safety hazards, and lead to performance failures.
Many consumers blindly trust their installers and lack an understanding of relevant requirements. This guide helps all readers clarify these core standards.
Step 1: Choosing the Right Location
The first thing a professional installer should do is inspect the location where the battery will be mounted. This is one of the most important parts of the installation because the battery’s performance and lifespan depend heavily on the environment.
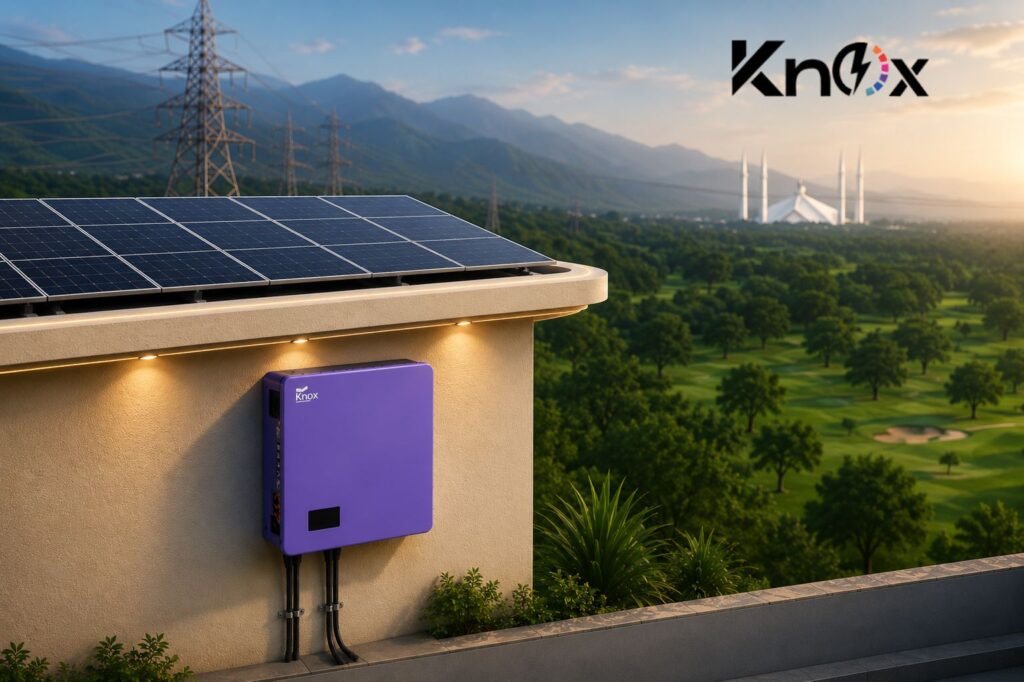
The Knox Powerwall 6.11 is a wall-mounted lithium iron phosphate (LiFePO₄) battery. It works best in a cool, dry, and ventilated area. The ideal location is usually inside the house, in a utility room, garage, or covered veranda.
In Pakistan, extremely high-temperature weather occurs frequently during summer. Direct sunlight and sustained high temperatures cause long-term performance degradation to Knox Powerwall energy storage batteries. Although this product comes with built-in protections integrated into its native battery management system (BMS), it still needs to be placed in a shaded
area to extend its service life. The wall used for installation must be sturdy, with concrete or solid brick walls as the preferred option. The battery must also be installed in a location close to the inverter.
Avoid installing the battery
- On rooftops with direct sunlight
- Near water or moisture
- In rooms without ventilation
- Near fuel or gas storage
Step 2: Mounting the Battery on the Wall
Once the location is confirmed, the installer starts mounting the battery.
The Knox Powerwall 6.11 comes with a wall bracket that is fixed securely using heavy-duty bolts. The bracket must be perfectly level because even a small tilt can create pressure on the battery casing over time.
The battery weighs around 45 kg, so at least two people should handle the lifting process safely. After placing the battery on the bracket, locking bolts are tightened to secure it firmly.
This step normally takes around 30 to 45 minutes when done properly. A rushed installation can lead to loose mounting and future safety issues.
Step 3: Connecting the Battery to the Hybrid Inverter
This is one of the most technical and important stages of the installation.
The Knox Powerwall 6.11 connects to a hybrid solar inverter using DC battery cables. These cables transfer power between the inverter and the battery, so correct wiring is extremely important.
Professional installers use thick, high-quality cables because thin cables can overheat and reduce efficiency. Incorrect cable sizing can even damage both the inverter and the battery over time.
The installer must carefully connect the following:
- Positive terminal to positive
- Negative terminal to negative
Although this sounds simple, reverse polarity is actually a common mistake in Pakistan’s informal solar market.
A DC fuse or breaker should also be installed between the battery and inverter. This protects the entire system in case of short circuits or electrical faults.
Step 4: Connecting the Communication Cable
Many inexperienced installers skip this step, but it is extremely important for lithium battery systems.
The Knox Powerwall 6.11 includes a smart battery management system (BMS). The BMS communicates with the inverter through a communication cable such as RS485 or CAN.
This communication allows the inverter to:
- Monitor battery charge level
- Adjust charging automatically
- Prevent overcharging
- Prevent deep discharge
- Improve overall battery safety
The battery communication cable is an indispensable component of residential photovoltaic (PV) energy storage systems. Without this cable, inverters cannot read battery status, which will trigger incorrect charging
and shorten battery lifespan. All mainstream hybrid inverters from Growatt, Deye, and Shouhan, leading PV brands in Pakistan’s market, support this function, and system owners must confirm the cable is properly connected at both ends during installation.
Step 5: System Configuration and Testing
After all wiring is complete, the installer should fully test and configure the system before leaving.
This process is called commissioning.
During commissioning, the installer should:
- Select the lithium battery mode on the inverter
- Enter the correct voltage and capacity settings
- Check battery indicators and system status
- Confirm there are no error codes
- Test charging through solar panels or the grid
- Simulate a power outage to test backup mode
The installer should also check whether the battery charges smoothly during sunlight hours and powers the home correctly during backup operation.
A proper commissioning process usually takes close to an hour. If the installer leaves immediately after switching the system on, the setup may not be complete.
Step 6: What You Should Check Yourself
After installation is complete, homeowners should also inspect the system themselves.
Make sure:
- The battery feels firmly mounted
- No wires are loose
- No copper wiring is exposed
- The communication cable is connected
- The inverter display shows normal charging
During the first day, monitor the inverter screen. The battery percentage should slowly increase during the daytime and gradually decrease at night as the house uses stored power.
If you notice sudden drops, warning signs, or unusual behaviour, contact the installer immediately.
Final Thoughts
When the Knox Powerwall 6.11 is installed correctly, It handles your home’s energy needs every day. It saves extra solar energy during sunlight hours and uses it later during load shedding or at night.
One of the biggest benefits is comfort and convenience. There is no need for fuel, no noisy generators, and very little maintenance.
