


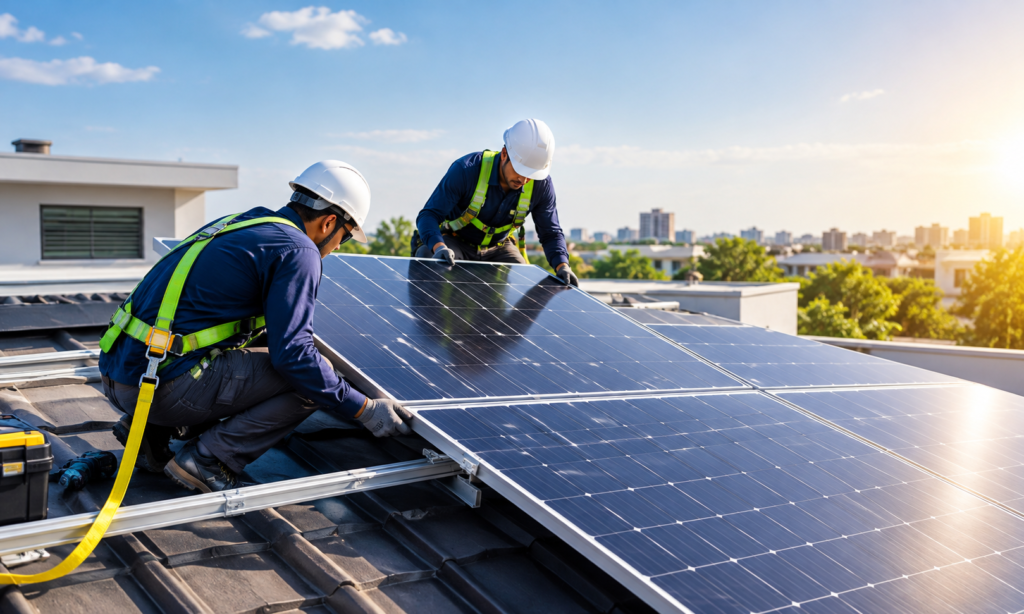
How to Install solar Panel Without Mistakes
How to Install solar Panel Without Mistakes
Every summer the same story plays out. The bill arrives, the load shedding starts, and the generator hums on. Many families decide “enough is enough” and go solar. Then comes the bad part: a badly fitted structure, a wrongly sized inverter, or a system that never gets approved for net metering.
This guide from Knox Solar is written to help you avoid those mistakes. It covers the whole journey, from planning to maintenance, in plain language.
Can You Really Install Solar Yourself in Pakistan?
Partly, yes. But be honest with yourself about which parts.
If you are comfortable with tools and working at height, you can handle some tasks, such as marking the layout, fixing the mounting structure, and placing the panels. Other tasks should always go to a qualified electrician or installer:
- AC and DC wiring
- Earthing and surge protection
- Inverter commissioning
- Net metering paperwork
Electricity is unforgiving. A loose DC connection can cause a fire, and a poor earthing job can put your family at risk. The smartest approach is a hybrid one: do the simple physical work yourself and let a professional handle the electrical side.
Step 1: Find Out How Much Power You Actually Use
Do not buy a system based on a neighbour’s advice. His house is not your house.
Take your last 6 to 12 months of electricity bills and look at the units (kWh) used each month. Summer and winter are very different, so check both. Then list what you want to run during an outage: fans, lights, fridge, TV, AC, water pump.
A few quick questions will guide your sizing:
- What is your average monthly consumption?
- Do you run an air conditioner during the day, when solar produces the most?
- Do you want backup during load shedding, or only bill savings?
- Is your usage likely to grow (a new AC, an electric vehicle, a second floor)?
Your answers decide the system size. Too small and you will still pay big bills. Too large and you pay for capacity you cannot use.
Step 2: Choose the Right Type of System
This is where many buyers get confused, so here is the simple version.
On-grid system: Works with the WAPDA/DISCO connection and has no batteries. It is the lowest-cost option and works well with net metering. The catch is that it shuts down during a blackout for safety reasons.
Hybrid system: Includes a hybrid inverter and batteries. It gives you backup during load shedding and can also connect to the grid. It costs more but suits areas with long outages.
Off-grid system: Fully independent of the grid. It is mostly used in remote areas without reliable supply.
For most city homes with frequent outages, a hybrid system gives the best balance. If your area has stable supply and you mainly want to cut bills, on-grid is often enough.
Step 3: Check Your Roof and Pick the Best Spot
Solar panels need sunlight, and good Pakistani sunshine is on your side. But placement still matters.
- Direction: In Pakistan, south-facing panels capture the most energy across the year.
- Tilt: A tilt roughly equal to your city’s latitude (around 30° for much of Punjab) is a sensible starting point.
- Shade: Water tanks, boundary walls, neighbouring buildings, and even a tree can cut output badly. Check the roof at 9 am, noon, and 3 pm.
- Strength: Make sure your roof can carry the extra weight, especially in older construction.
- Wind: Pakistan’s pre-monsoon storms can be fierce. Your structure must be firmly anchored.
Step 4: Get Your Paperwork Ready
If you want net metering, do not skip this part. Rules and procedures are set by NEPRA and implemented through your local distribution company (LESCO, IESCO, MEPCO, K-Electric, and others).
Typically you will need:
- A recent electricity bill and your CNIC
- A system design and single-line diagram
- Equipment specification sheets
- An application to your distribution company, followed by inspection and meter installation
Net metering policy and buyback rates have been revised more than once in recent years. Always confirm the current rules with your distribution company before you finalise your system design. This one step can change what kind of system makes financial sense for you.
Step 5: Gather the Right Tools and Safety Gear
Do not climb onto a roof in slippers with a borrowed ladder. Before you start, have:
- A sturdy ladder and a safety harness
- Rubber-soled, non-slip shoes
- Safety glasses and work gloves
- A drill, spanners, and a measuring tape
- A multimeter for checking voltage
- A fire extinguisher nearby
Also avoid working on the roof in peak afternoon heat. Metal surfaces can get hot enough to burn skin, and heat exhaustion is a real danger in Pakistan’s summers.
Step 6: The Installation Process, Step by Step
1. Build a strong mounting structure
Your structure holds panels in place for 20 years or more, so do not cut corners here.
- Use hot-dip galvanised or properly coated steel to resist rust, especially in humid cities and coastal areas.
- Fix the base to the roof with strong anchor bolts, and seal each point to prevent leakage.
- Keep a small gap between the roof and the panels so air can flow and cool them.
- On ground mounts, use concrete footings and give them enough time to cure before loading.
2. Place the inverter wisely
Mount the inverter in a shaded, ventilated spot, away from direct sun and rain. Heat shortens an inverter’s life. Keep it close to the panels and your main distribution board to reduce cable length and losses.
3. Mount the panels
Set the panels on the rails and secure them with proper clamps. Leave neat spacing between them. Connect the panel cables before the final tightening, since connectors can be hard to reach afterwards. Wear gloves, because panels generate voltage the moment sunlight hits them.
4. Install the batteries (if you have a hybrid system)
Place batteries in a cool, dry, ventilated room, never in a sealed cupboard. Lithium batteries need correct settings for their charging profile. Lead-acid batteries need regular checking. Follow the manufacturer’s manual closely.
5. Wire everything together
This is the stage for a qualified electrician. Good wiring includes:
- Correctly sized DC cables with UV-resistant insulation
- DC and AC breakers or isolators
- Proper earthing for panels, structure, and inverter
- Surge protection, vital in a country where lightning and voltage spikes are common
Never use cheap, undersized wire to save money. It is the quickest way to overheating.
Step 7: Test, Inspect, and Switch On
After wiring, test before you celebrate. Check voltage and polarity, confirm that the inverter is reading the panels, and verify that earthing is solid. If you applied for net metering, your distribution company will inspect the system and install a bidirectional meter before it can officially operate.
Once the meter is in, you start exporting extra units and reducing your bill.
Step 8: Set Up Monitoring
Most modern inverters come with a mobile app. Connect it to your Wi-Fi and check it a few times a week. If production suddenly drops on a sunny day, something is wrong, and you will catch it early instead of discovering it months later on your bill.
Maintenance: Pakistan’s Dust Is Not a Small Problem
Solar panels need little care, but dust is the exception here. A layer of dust, bird droppings, or construction debris can reduce your output noticeably.
- Clean panels regularly, ideally early morning or evening when they are cool. Use clean water and a soft cloth or brush. Never spray cold water on hot glass.
- Avoid harsh chemicals and metal scrubbers that can scratch the surface.
- Inspect the structure after storms and heavy rain for loose bolts or shifted panels.
- Check cables and connectors for cracks, rodent damage, or discolouration.
- Look after the batteries and keep the inverter area clean and ventilated.
- Watch your monitoring data every month and compare it with previous months.
Common Mistakes to Avoid
- Buying equipment on price alone, without checking warranty and local service support
- Ignoring shade from nearby buildings
- Skipping proper earthing and surge protection
- Choosing an inverter that is too small for future growth
- Starting installation before confirming net metering requirements
- Letting an unqualified person handle the wiring
So, Is Solar Worth It?
For most Pakistani households facing high tariffs and unreliable supply, a well-planned solar system can pay for itself over time and then keep saving you money for years. The key words are well-planned and well-installed. A good system quietly does its job every day. A poor one becomes a very expensive headache.
Need a Hand? Talk to Knox Solar
Whether you want a complete turnkey installation or just a professional to check your design and make the final electrical connections, Knox Solar can guide you through each step. Share your electricity bill, tell us about your roof, and we will help you choose a system that fits your needs and your budget.